No2 MH Cincinati Mill
On this page one will Find the 1938 Cincinnati No.2 MH milling machine that features an independent vertical milling head. The serial number is 5A2P1F-52. I converted it to run on single phase 220V power.


I acquired this mill from my past employer for a bout double scrap steel price. I then spend a fair deal of time fixing the electrical to run on 220V single phase power. I added some custom electronics and use an old VFD drive of winch i had to hack the input encoder to get the drive to function.
The bigger drive was scrap and i was able to fix it and reprogram it to work with this 5HP 3 phase motor. The custom circuit board was a hack to make the drive think at had an encoder feed back signal.
I used that feed back signal to actually drive the motor to its correct RPM. i had to make the signal ramp to get it up to speed. The input signal was a quad encoder input. I did have to jumper a lot of safety's out to get it to work... but the safety's were not needed in this application. This big 5HP motor is used for the table functions and to drive the horizontal mill head.
The smaller VFD drive was new. I used it to drive the vertical mill head. even tho it has gears the variable speed control is a nice option.
I spent about 3 months straight to convert this mill to my liking. But in the end i had to move 2000 miles and was not going to try to hull it that far. so I let my neighbor next door buy it and i know he will put it to good use! Enjoy Mark!
Here is the videos on this, there is a lot of text and photos below also:

Here is was after we loaded it! me on the left and my dad on the right:


it sure did come with the accessory's!! that alone was a gold mine! i did keep a lot of theses bits as i may use them in the future. But the rest of them went with the mill to Mark.


The motor's on this unit are both 3phase one is a 1/2 HP and the other is a 5HP both rated for 220/440V and not the normal 480V. its just because there older. It was "new" to me :) ( I'm use to industrial standards)


So i started out with this circuit to mock the encoder. this maid my Quad encoder signals:

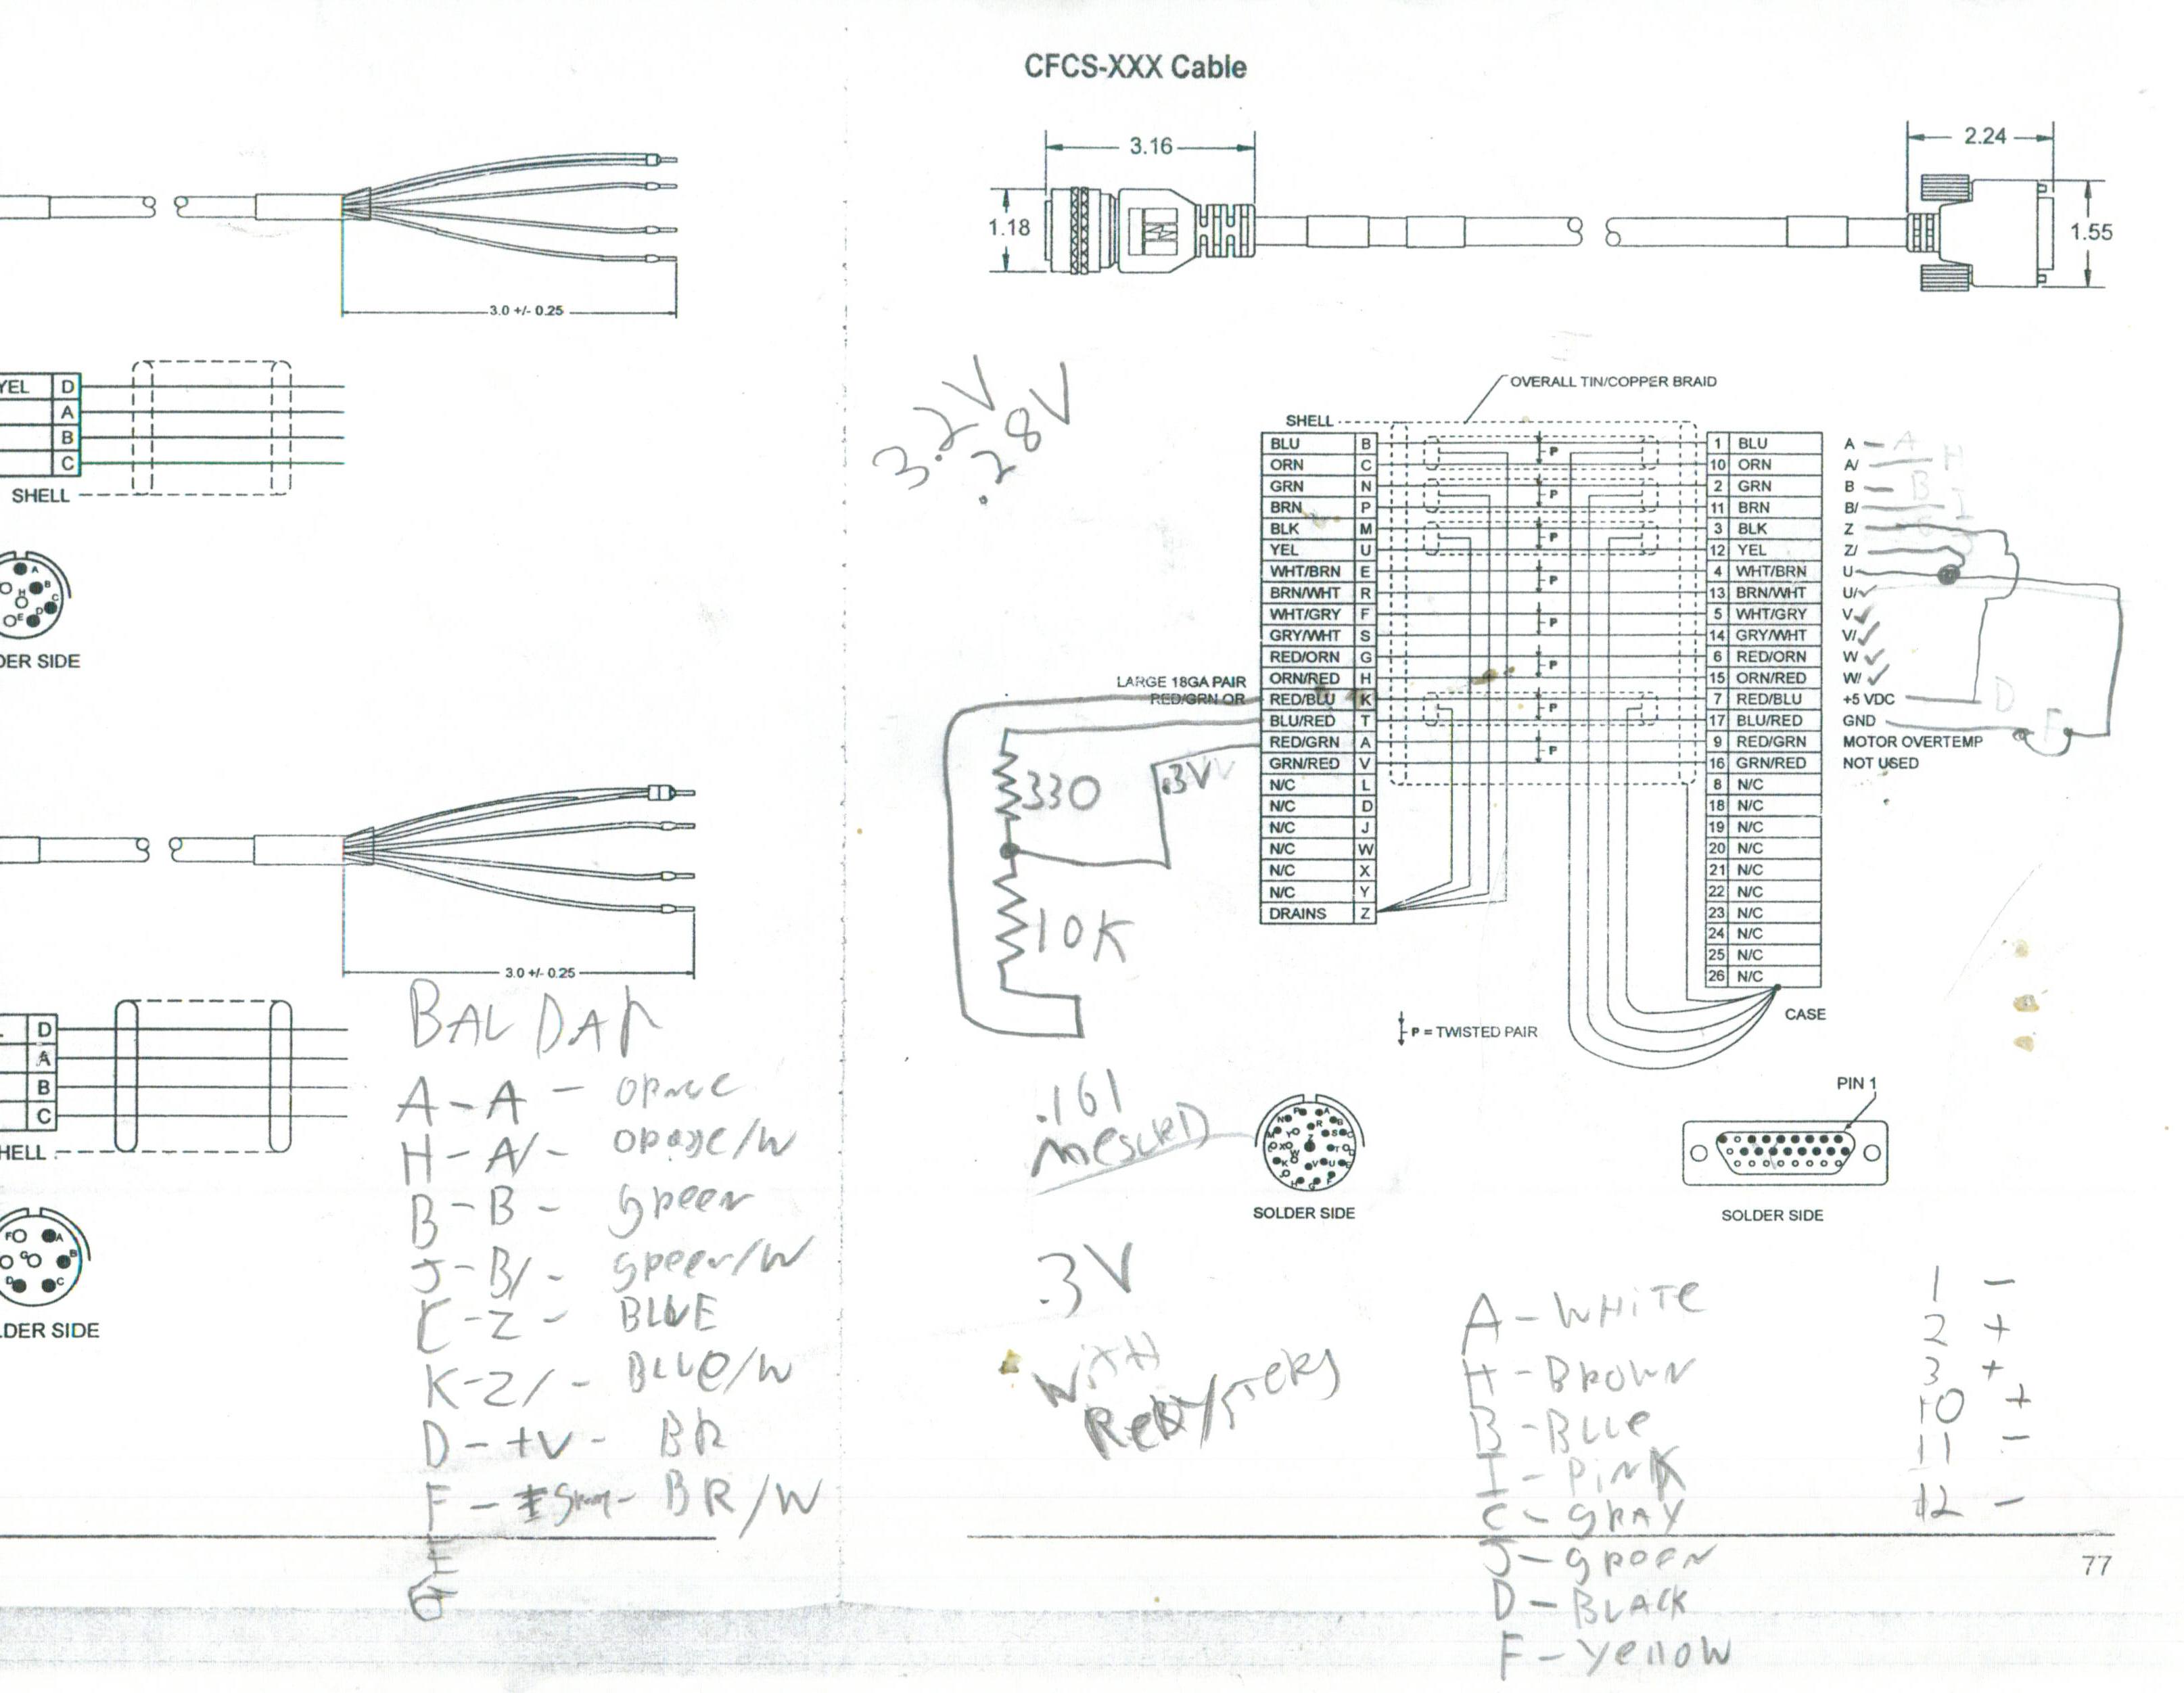
 here is Schematic... yeah its a bit messy!
 I then started testing. alot of testing! here is some more of the rewiring and jumpering i had to do on the drive:
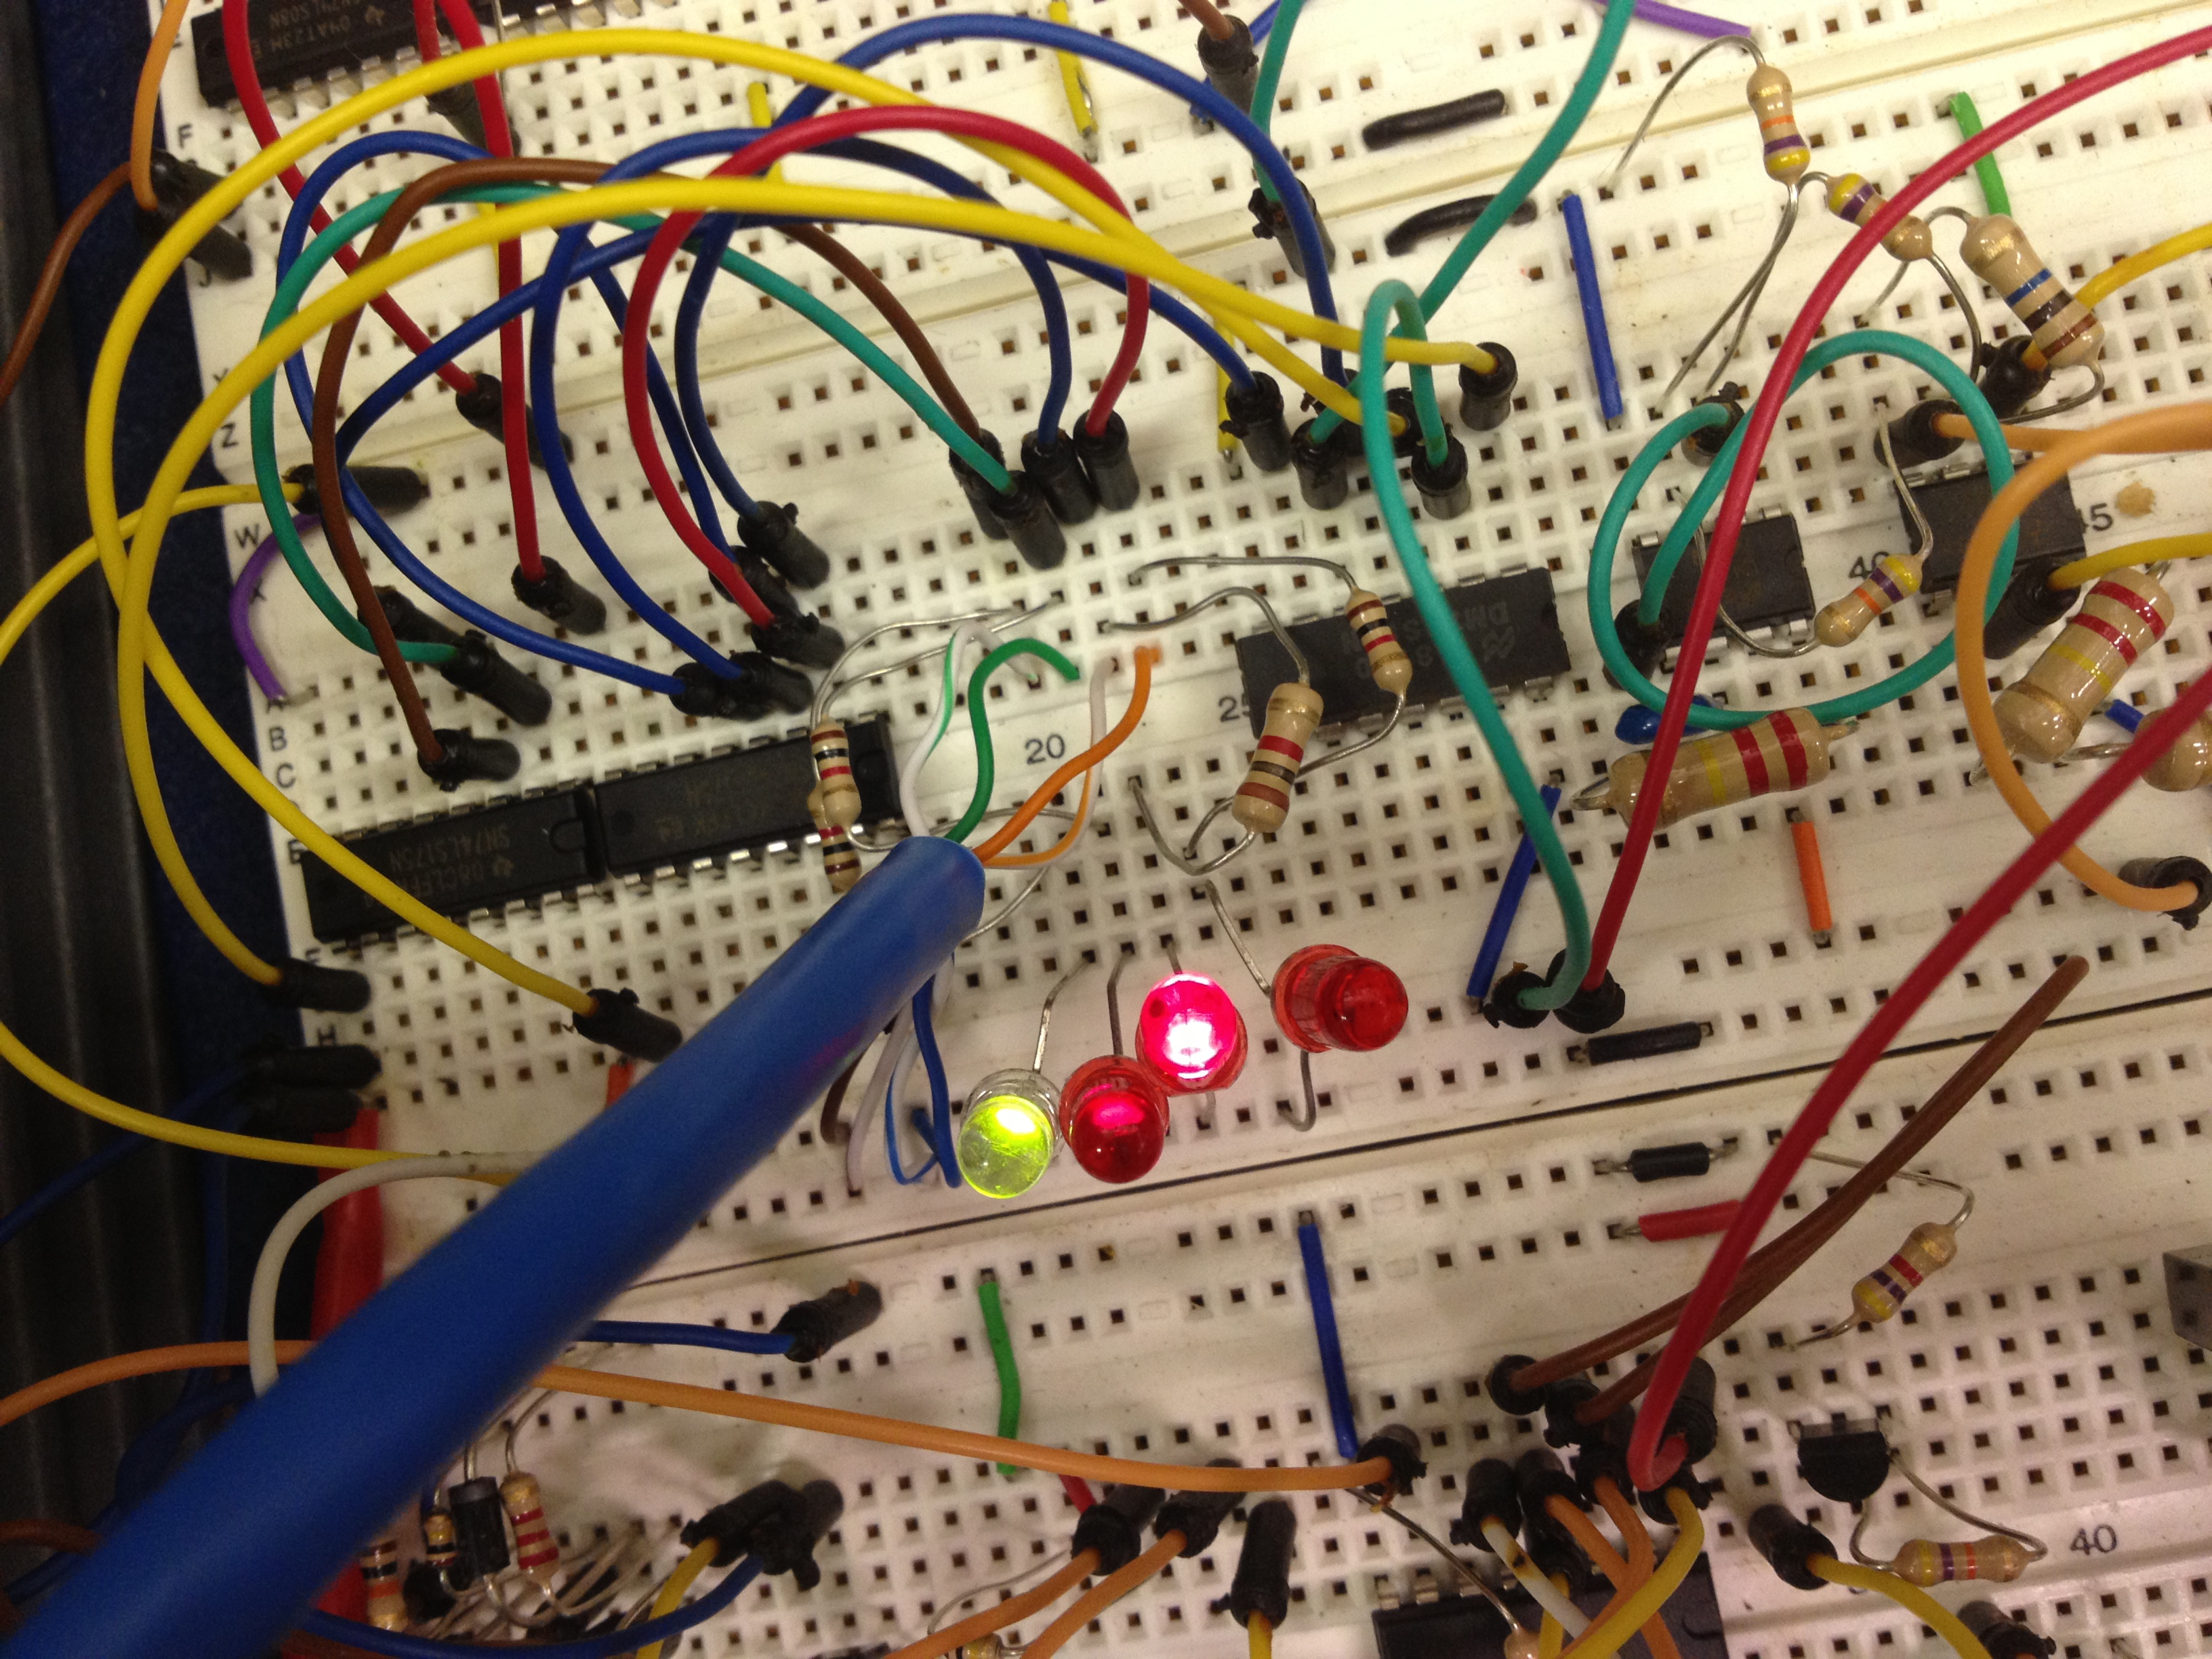
I then connected this all up on the breadboard:

yep that's how you know its custom :)

This is an Emerson Industrial Automation - Control Techniques drive with a FM-3PB card on the front.
 more wiring :


Here is a nice little video showing the process i went through to get this drive "hacked"
I then created the circuit board and schematic to wire all the electronics:


 Then off to start wiring the unit!
This is a reliance electric drive.


This transformer i use to step up the voltage to 480V. it is connected backwards. running a single phase to the VFD drive. the small drive i used will run on a single phase because it just goes to a DC buss.


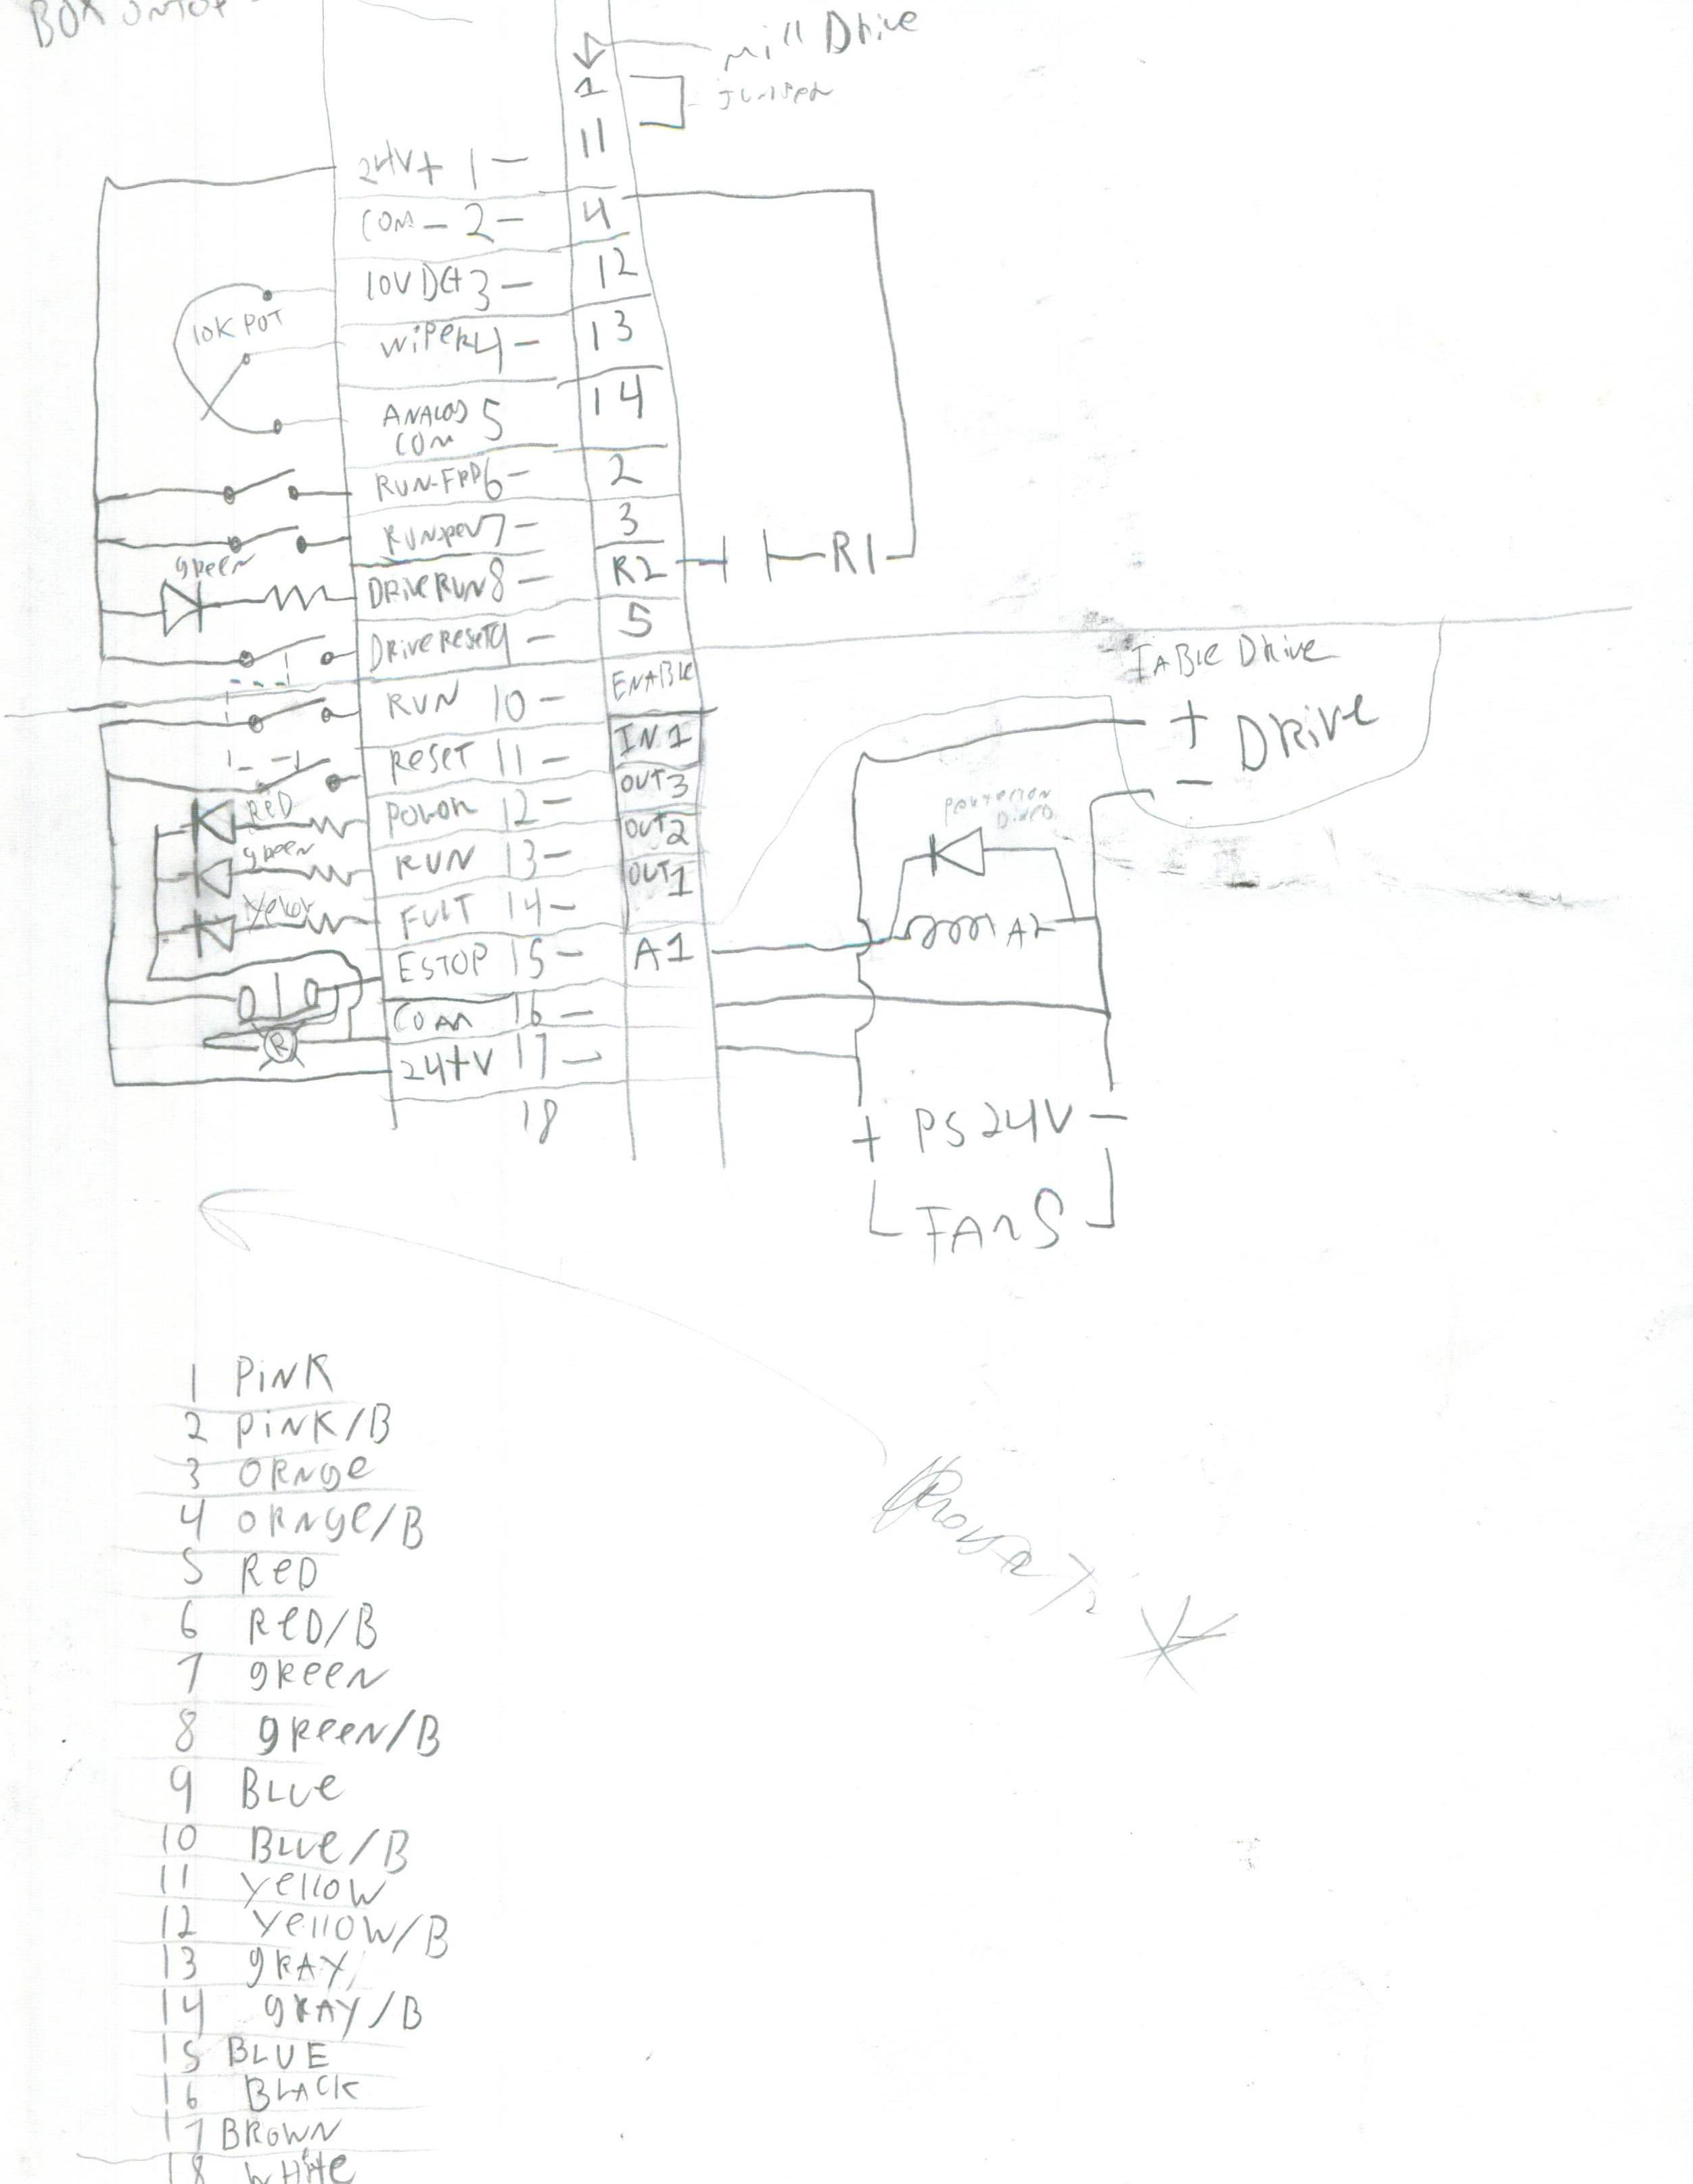
 Here is the controls box. There are 4 lights indicating faults or run on the drives, 2 selector switches, a reset button for the drives, an E stop, and a speed control knob.

that was a ton of work but well worth it!
This big switch on the side was to change the horizontal mill motor direction. I originally cleaned and connected it all But the VFD drive keep tripping so i jumper'd it out. I have forward and reverse on the control panel.


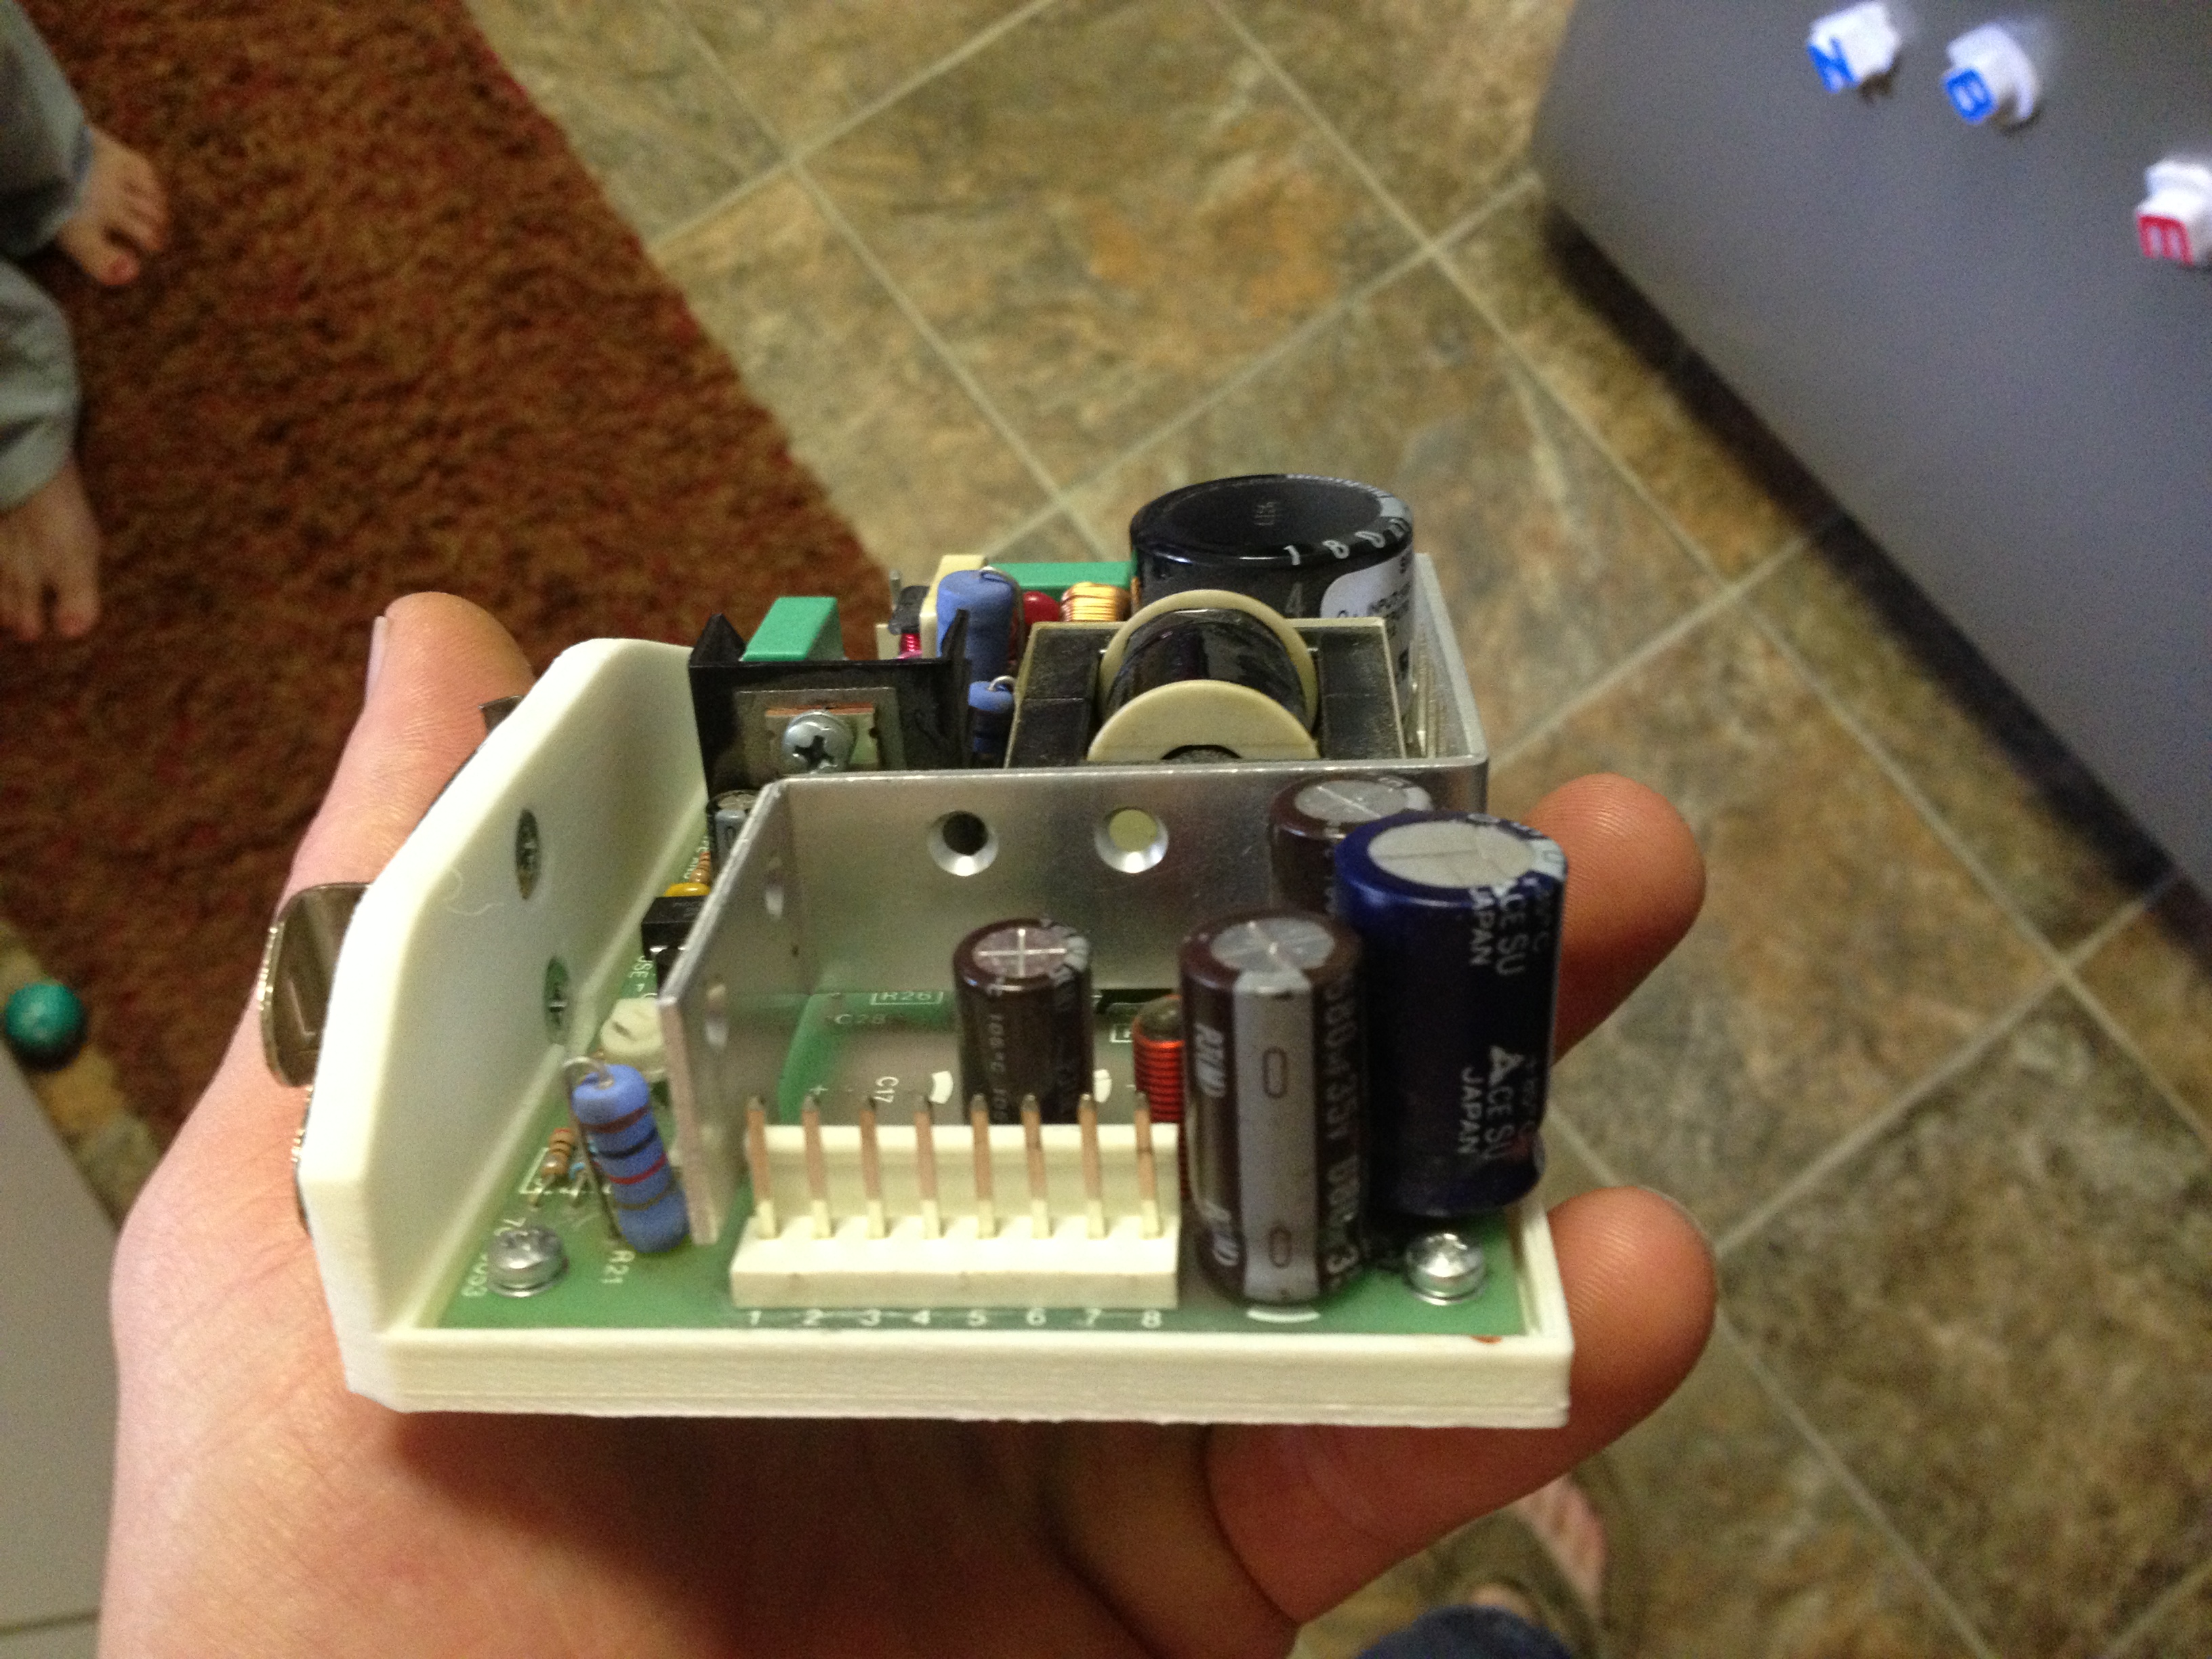
I also needed a 24V power supply and did not have one small enough but found this one in my scrap parts. i think it came out of a different VFD drive of some kind. i then 3D printed a bracket to hold it in place

if you look close i have some text right in to the print:


Then i need some fan covers... : yep printed those as well!


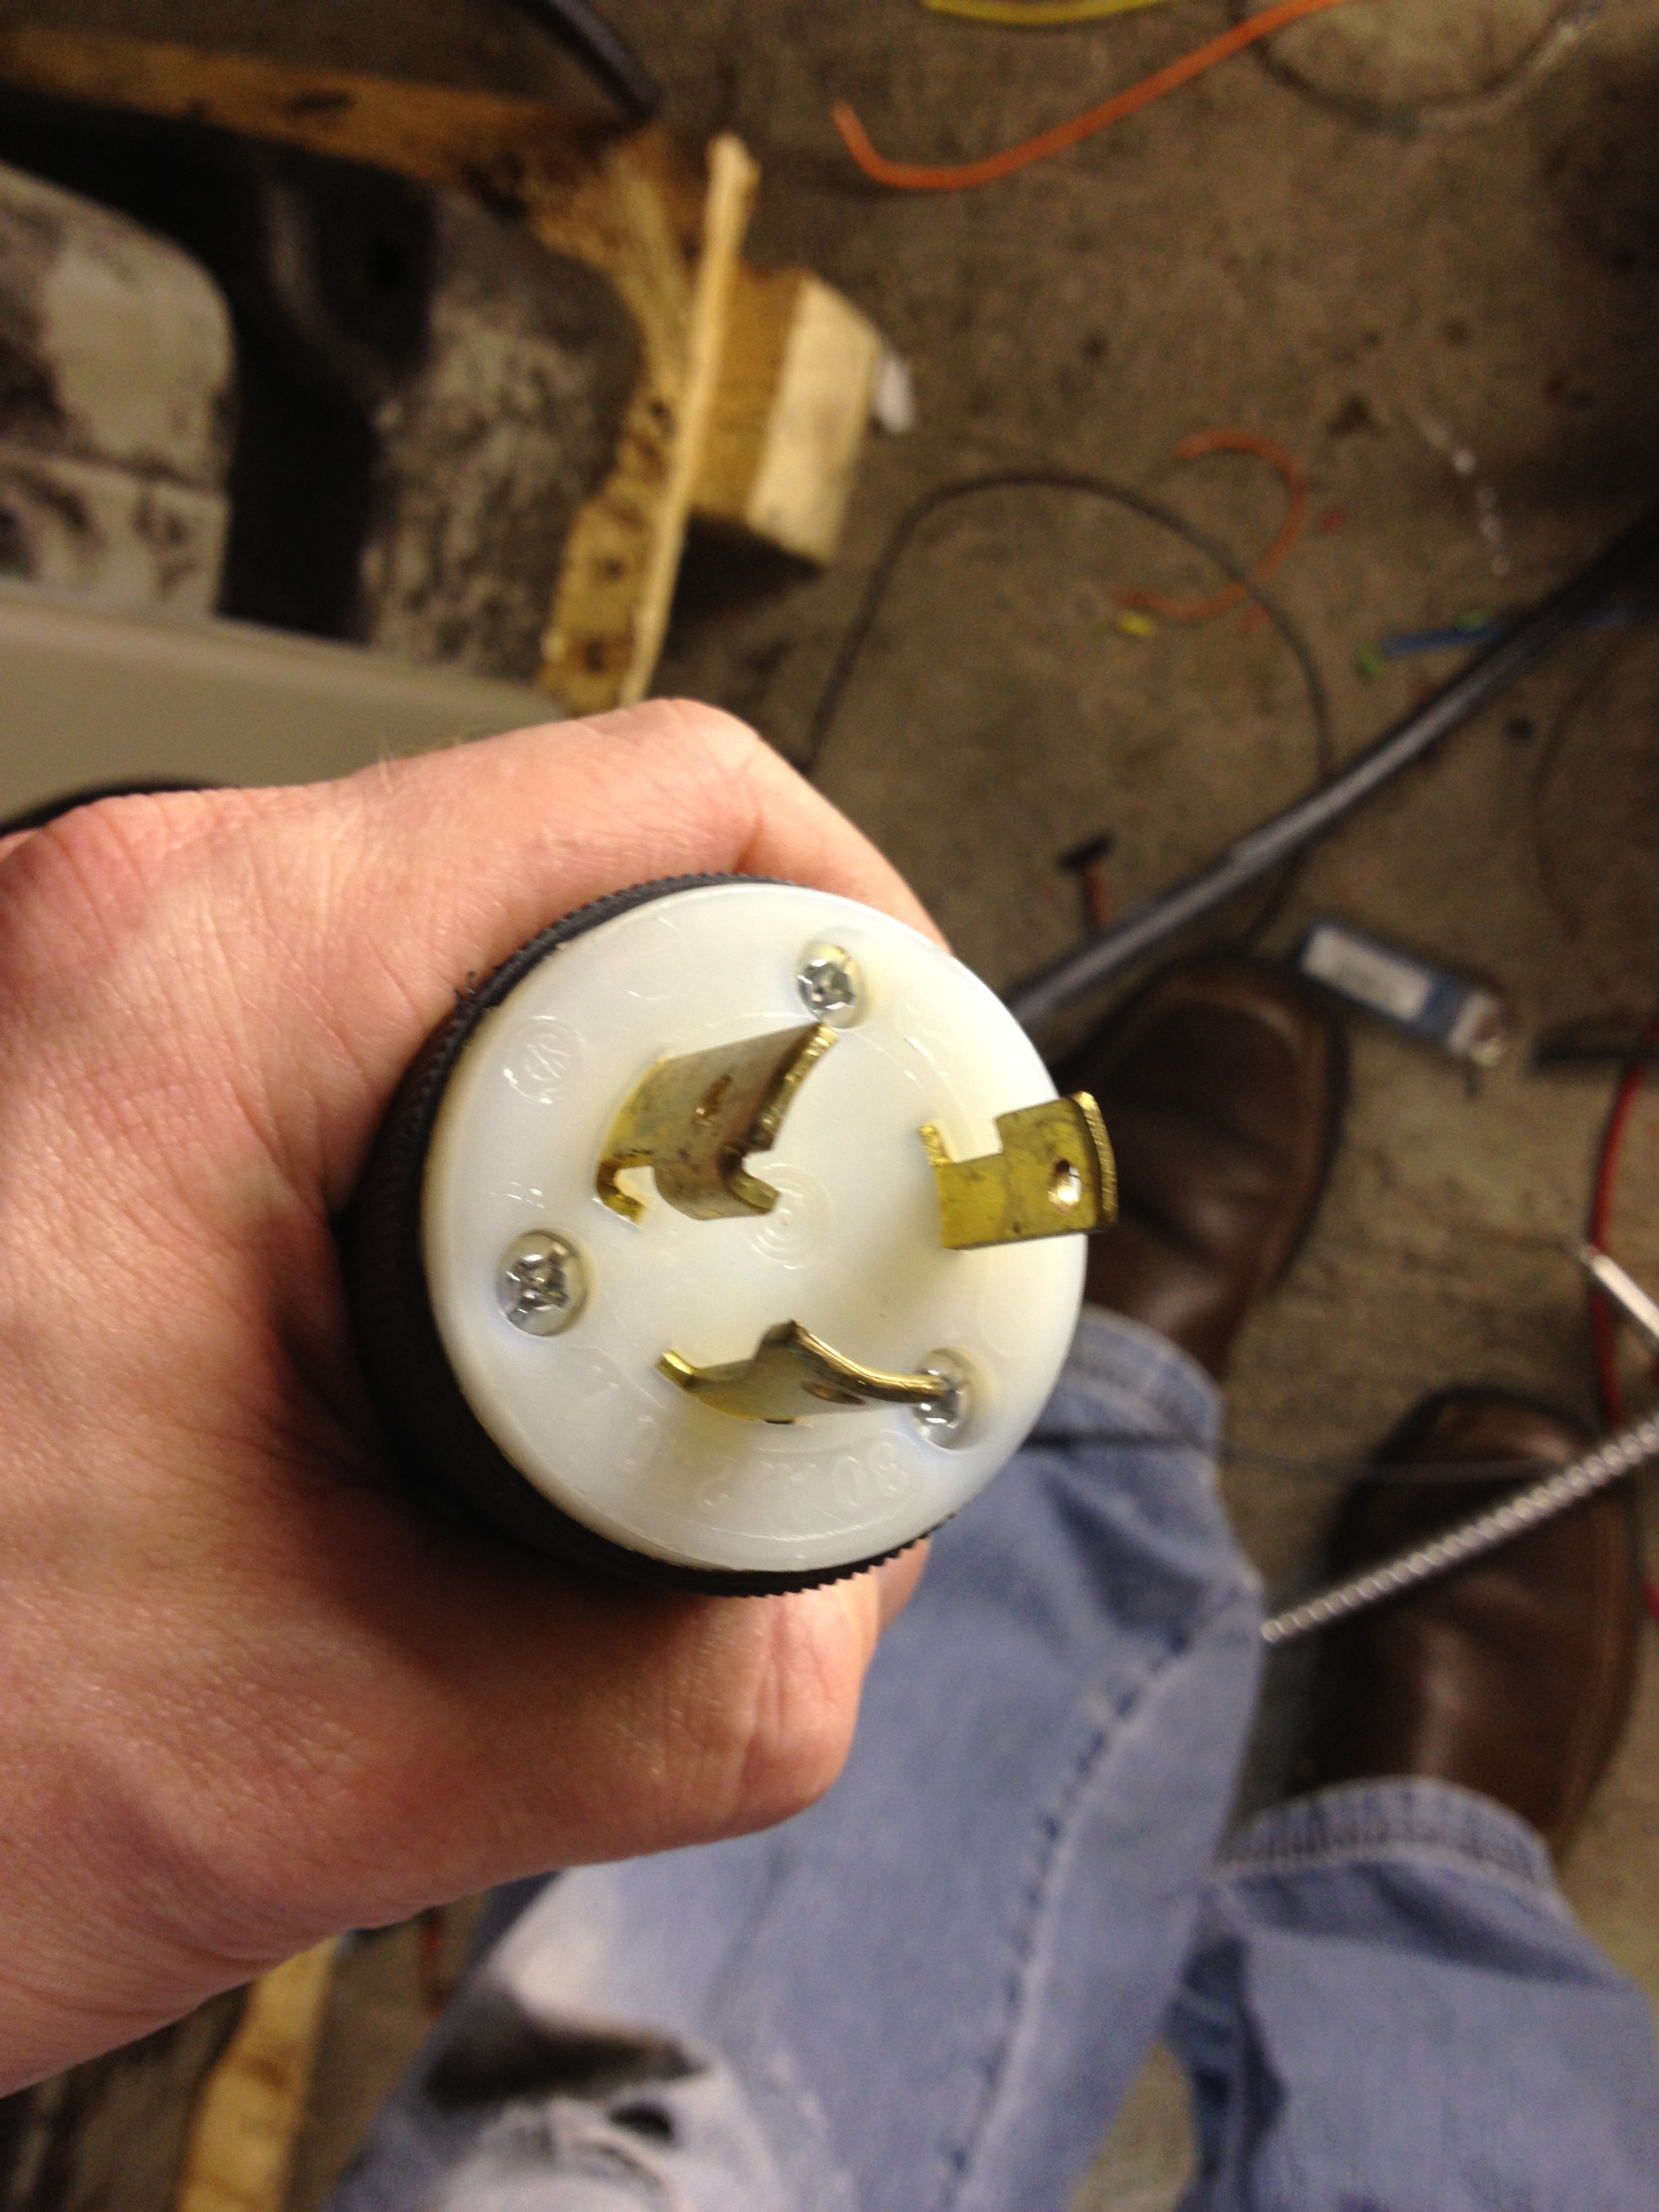
Time to plug it in! single phase 220V!
And there is is packed in there with all the other projects! a little love and care can go along way. all the way from 1938~2013!
 hope you enjoyed this one!
~Russ Gries

Pages
- Contact Me
- Donate!
- Events
- Forum
- Home
- Open Projects
- “When I was a kid” (projects)
- 10,000 Joule RailGun
- 10,000J Cap Bank
- 3D Printing Research
- Automatic Pulse Fire Sequence Generator.
- Bedini Charging System
- Brushless CNC Spindle Build 3DP
- Burn-O-Meter
- Cold Fusion / LENR
- CommutaCar EV
- Constant Voltage AC Supply
- DYI Making Poly-Magnets CMR
- Edward Leedskalnin PMH
- Electrolysis Rods
- Gerard Morin
- Honda PA50II “Hot Rod” Hobbit
- Impulse Magnetizing Experiments
- John Hutchison (Hutchison Effect)
- K’nex Structure
- Lenz lawless generator
- Magnetic Levitation & kits
- Magnetic Tester
- MEP006A 60KW GenSet
- Mini Rail Gun
- No2 MH Cincinati Mill
- Papp Noble Gas Engine
- Power Supply Build
- Stanley Meyer’s WFC Tech
- Sterling Engine
- The ‘Infinity’ Motor/Generator
- The High Voltage Water Bridge
- The Search For Answers
- TheGAPpower Replication
- Torrid Coil Winder
- Voltzilla EV Motorcycle
- Vortex Based Math Research
- Wire Straightener / Counter
- Pages
- Use Your Resources
- Useful Links
- YouTube